A tour of the Scroom UI
Scroom was designed to view very large bitmaps (250 thousand pixels by 250 thousand pixels). At those sizes, scrollbars are not very convenient for navigating. If you drag the scrollbar, the image will move too fast. If you instead click on the scrollbar arrows, the image will move too slow. Therefore, Scroom has a google-maps like interface: Move the bitmap by dragging with the left mouse-button, and use the scroll-wheel to zoom in or out. You’ll notice that the pixel under the mouse-pointer doesn’t move while zooming. This way, you can view any detail by just pointing at it and zooming in. If you want to use a tool instead, like “Measure” or “Pipette”, drag with the right mouse-button instead.
Plugins determine what can be visualized, and they can be used to add features.
The scroom main window
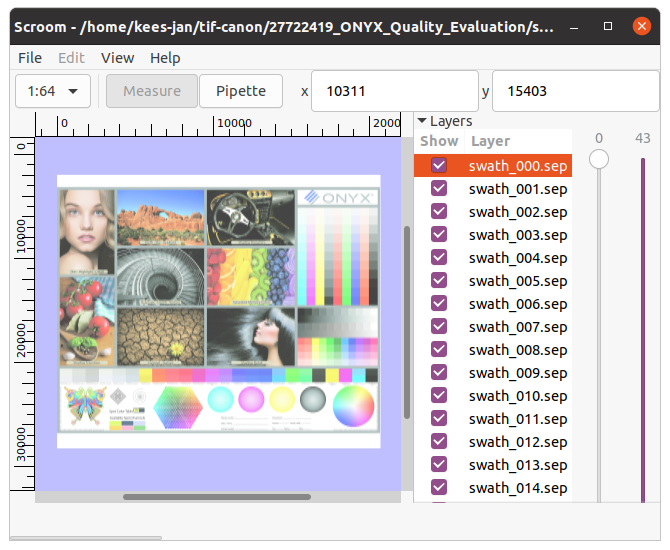
On the toolbar, you’ll see the current zoom factor, any toolbar buttons that have been added by the loaded plugins, and two fields showing the coordinates of the pixel that is currently in the middle of the view. You can edit these values to move to specific coordinates, or navigate using the mouse. To the right of the image is the sidebar. Plugins can add widgets, related to the image, here. At the bottom is the statusbar with a progressbar.
Of the menus, the “File” menu is the most interesting. It contains the “New” menu item, for showing things that are not loaded from file. It also contains the “Open” menu item, for showing things that do need to be loaded from file. Lastly, it has the “New window” menu item, for opening a new window showing, for example, an already opened file.
“New window” needs special care when designing plugins. It means that PresentationInterface::open() can be called more than once, and PresentationInterface::redraw() might have to do different things, depending on for which view it is called.